In my previous post, I explained how to install PhoneGap on a Macbook Pro and test a “Hello World” application on an iOS simulator as well as an actual device. In this post, you will see how easy it is to build a simple mobile application for the iPhone using the PhoneGap framework. Specifically, you will learn how to use the accelerometer and build a simple “app” that will display the instantaneous acceleration of the iPhone in both graphical and text format.
Let’s take a look at the final product. Shown below are a couple of snapshots of the app in action, with the iPhone held in three different orientations. I developed and tested the app for an iPhone 4 (from late 2010). The app should work fine on newer iPhone models as well, although I have not tested this myself. Note that this app will not work on an iOS simulator. You will need an actual iOS device (either iPhone or iPad).
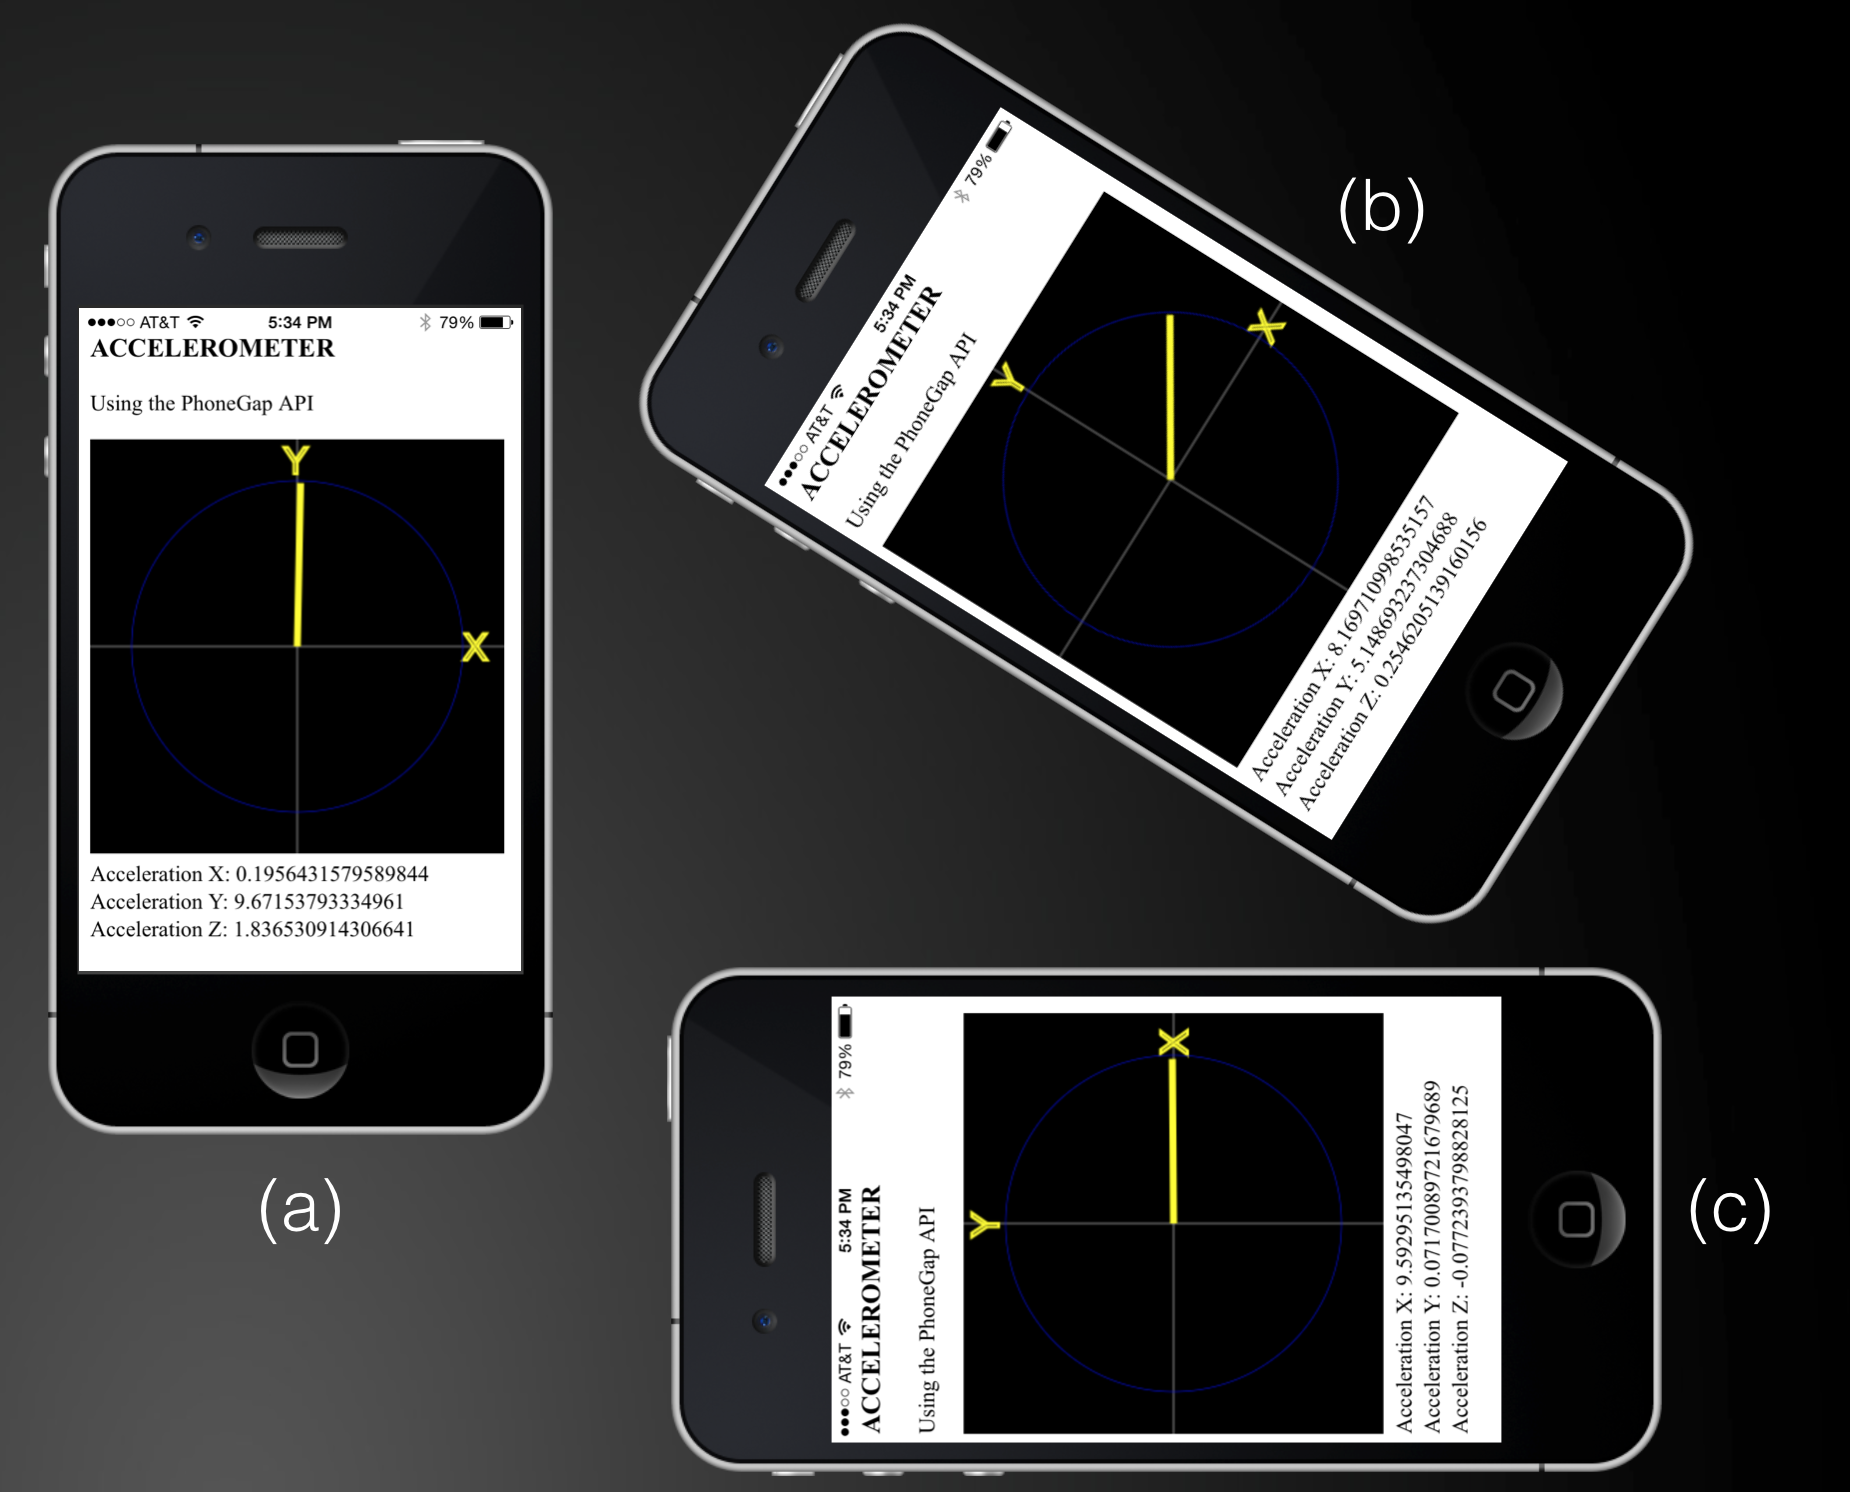
Observe how the X and Y axes are oriented with respect to the phone. The Z-axis (not shown) points out of the page towards the reader. The coordinate system represented by X-Y-Z always remains fixed with respect to the phone.
The yellow line from the origin can be thought of as an arrow that begins at the origin and points along the direction in which the device is being accelerated. If the phone is stationary, this direction is exactly opposite to what most people understand as the direction of gravitational force (pointing towards the ground). For some more background on the physics of gravity and acceleration, please refer to this article.
Finally, the actual acceleration values along X, Y and Z are printed below the graphics window (yes, the graphics is based on HTML5 canvas) and these numbers are all in units of [m/s2]. You may recall from high school physics that the acceleration due to gravity on the Earth’s surface is approximately 9.8 [m/s2].
Look at the different orientations (a), (b) and (c) in the above picture and make sure you understand what the results mean for each one of them.
—
Now that we understand everything from the physics point-of-view, let’s get back to the software side of things. The following steps are necessary to build this application:
STEP 1: Install and test PhoneGap (see my previous post)
STEP 2: Create a new project
$ phonegap create accel --name Accelerometer --id com.company.accel
All subsequent PhoneGap commands should be run inside the accel folder.
STEP 3: Add the accelerometer plugin
$ phonegap local plugin add https://git-wip-us.apache.org/repos/asf/cordova-plugin-device-motion.git
STEP 4: Add the HTML5 and JavaScript code
Pull the source code from my GitHub repo using
$ git clone https://github.com/jabhiji/ios-accelerometer-phonegap.git
Move the file “index.html” from the repo folder to the “www” folder of your PhoneGap project.
The basic idea is to get acceleration data from the device every 100 milliseconds and use this data to update the drawing inside the canvas element. The code above is based on some minor modifications to the example code provided on the PhoneGap API documentation. Specifically, it adds the graphical display component using HTML5 canvas.
STEP 5: Build, deploy and run
Like before, all you need to do is:
$ phonegap build ios
followed by
$ phonegap run --device ios
This will compile the code and deploy the application on your device and the run it.
STEP 6: Enjoy your accelerometer!
While all of this can be polished further depending on your individual taste, you are now all set to test drive this app in any location you can imagine. Drop me a line if you find any bugs or think the results are not accurate or don’t make physical sense.
—
In summary, we have written a HTML/CSS/JS application and deployed it to an iOS device using PhoneGap.