Category Archives: animation

iOS – Maze

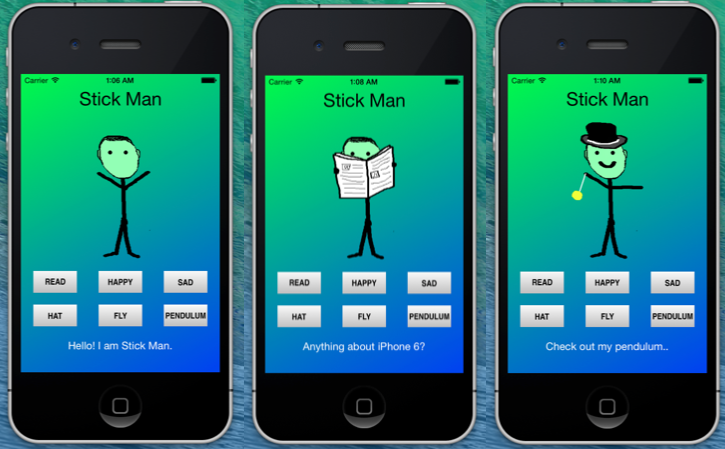
My latest app for the iPhone is about creating a maze pattern using the touchscreen and then guiding a ball through the maze by tilting the phone in the appropriate direction. You create the maze in a block-by-block fashion by tapping the screen with your finger. One tap puts a solid block. Another tap at the same location removes the solid block. You can create any maze pattern, for example the one shown below.

Screen Shot 2014-05-23 at 11.28.46 PM

Hitting the CLEAR button removes all solid blocks. The ball bounces off the edges of the domain and also bounces off solid blocks. Implementing the model logic where the ball bounces off the domain edges is quite straightforward. Extending the model to include the solid blocks required some additional thought and this was perhaps the main take away from this project for me.

The entire source code can be downloaded from:

https://github.com/jabhiji/ios-maze.git

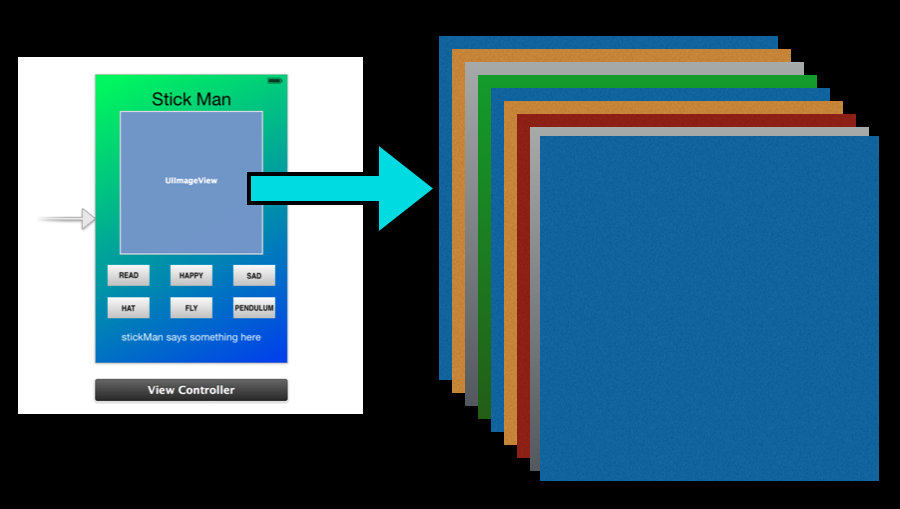
The Model class contains all the necessary properties and methods to specify the structure of the maze and to specify the ball location and update the ball location with time. The maze is simply a 2D integer array (LGEO), where the array element is 1 if the location is a solid block and 0 otherwise. Here is the Model class interface:

#import <Foundation/Foundation.h>

@interface Model : NSObject

// LGEO array
@property int nx, ny;
@property NSMutableArray* LGEO;

// domain size
@property float width, height;

// ball
@property float x, y, R, ux, uy, ax, ay;
- (void) updateBallPosition;

// coefficient of restitution
@property float COR;

@end

The name “LGEO” stands for “Logical GEOmetry array” and is a terminology rollover from some of my old CFD research codes, where a similar 3D array is used to describe a porous material. The number of array elements along X and Y is nx and ny respectively and the size of the LGEO array is thus nx*ny. The width and height are obtained based on the size of the UIView and used to calculate the grid size along X and Y. The remaining parameters specify the ball size, location, velocity and acceleration. The implementation file shows the details about how the model handles collisions:

#import "Model.h"

@implementation Model

@synthesize nx, ny;
@synthesize LGEO;
@synthesize width, height;
@synthesize x,y,R,ux,uy,ax,ay;
@synthesize COR;

// override superclass implementation of init
-(id) init
{
    self = [super init];
    if (self) {
        nx = 12;
        ny = 12;
        LGEO = [[NSMutableArray alloc] initWithCapacity:nx*ny];
        for (int i = 0; i < nx*ny; i++) {
            int value = 0;
            [LGEO addObject:@(value)];
        }
        COR = 0.5;
    }
    
    return self;
}

- (void) updateBallPosition
{
    // kinematics
    x += 0.5*ux;
    y += -0.5*uy;
    
    // check for collisions with walls
    if (x > width - R) {
        x = width - R;
        ux = -fabsf(ux)*COR;
    }
    if (y > height - R) {
        y = height - R;
        uy = fabsf(uy)*COR;
    }
    if (x < R) {
        x = R;
        ux = fabsf(ux)*COR;
    }
    if (y < R) {
        y = R;
        uy = -fabsf(uy)*COR;
    }
    
    // check for collision with maze blocks
    float dx = width / nx;
    float dy = height / ny;
    
    // find out array location where the ball center is located
    int xIndex = x/dx;
    int yIndex = y/dy;
    
    // loop over all neighboring squares
    NSMutableArray* xCenter, *yCenter, *distanceFromCenter;
    NSMutableArray *Nindex, *xIndexNbr, *yIndexNbr;
    xCenter = [[NSMutableArray alloc] initWithCapacity:9];
    yCenter = [[NSMutableArray alloc] initWithCapacity:9];
    distanceFromCenter = [[NSMutableArray alloc] initWithCapacity:9];
    Nindex  = [[NSMutableArray alloc] initWithCapacity:9];
    xIndexNbr = [[NSMutableArray alloc] initWithCapacity:9];
    yIndexNbr = [[NSMutableArray alloc] initWithCapacity:9];
    
    [xCenter insertObject:@(dx/2 + (xIndex-1)*dx) atIndex:0];
    [xCenter insertObject:@(dx/2 + (xIndex)  *dx) atIndex:1];
    [xCenter insertObject:@(dx/2 + (xIndex+1)*dx) atIndex:2];
    [xCenter insertObject:@(dx/2 + (xIndex-1)*dx) atIndex:3];
    [xCenter insertObject:@(dx/2 + (xIndex)  *dx) atIndex:4];
    [xCenter insertObject:@(dx/2 + (xIndex+1)*dx) atIndex:5];
    [xCenter insertObject:@(dx/2 + (xIndex-1)*dx) atIndex:6];
    [xCenter insertObject:@(dx/2 + (xIndex)  *dx) atIndex:7];
    [xCenter insertObject:@(dx/2 + (xIndex+1)*dx) atIndex:8];

    [yCenter insertObject:@(dy/2 + (yIndex-1)*dx) atIndex:0];
    [yCenter insertObject:@(dy/2 + (yIndex-1)*dx) atIndex:1];
    [yCenter insertObject:@(dy/2 + (yIndex-1)*dx) atIndex:2];
    [yCenter insertObject:@(dy/2 + (yIndex)  *dx) atIndex:3];
    [yCenter insertObject:@(dy/2 + (yIndex)  *dx) atIndex:4];
    [yCenter insertObject:@(dy/2 + (yIndex)  *dx) atIndex:5];
    [yCenter insertObject:@(dy/2 + (yIndex+1)*dx) atIndex:6];
    [yCenter insertObject:@(dy/2 + (yIndex+1)*dx) atIndex:7];
    [yCenter insertObject:@(dy/2 + (yIndex+1)*dx) atIndex:8];

    [Nindex insertObject:@((xIndex-1) + nx*(yIndex-1)) atIndex:0];
    [Nindex insertObject:@((xIndex  ) + nx*(yIndex-1)) atIndex:1];
    [Nindex insertObject:@((xIndex+1) + nx*(yIndex-1)) atIndex:2];
    [Nindex insertObject:@((xIndex-1) + nx*(yIndex  )) atIndex:3];
    [Nindex insertObject:@((xIndex  ) + nx*(yIndex  )) atIndex:4];
    [Nindex insertObject:@((xIndex+1) + nx*(yIndex  )) atIndex:5];
    [Nindex insertObject:@((xIndex-1) + nx*(yIndex+1)) atIndex:6];
    [Nindex insertObject:@((xIndex  ) + nx*(yIndex+1)) atIndex:7];
    [Nindex insertObject:@((xIndex+1) + nx*(yIndex+1)) atIndex:8];

    [xIndexNbr insertObject:@(xIndex-1) atIndex:0];
    [xIndexNbr insertObject:@(xIndex  ) atIndex:1];
    [xIndexNbr insertObject:@(xIndex+1) atIndex:2];
    [xIndexNbr insertObject:@(xIndex-1) atIndex:3];
    [xIndexNbr insertObject:@(xIndex  ) atIndex:4];
    [xIndexNbr insertObject:@(xIndex+1) atIndex:5];
    [xIndexNbr insertObject:@(xIndex-1) atIndex:6];
    [xIndexNbr insertObject:@(xIndex  ) atIndex:7];
    [xIndexNbr insertObject:@(xIndex+1) atIndex:8];
    
    // check for possible collision with all applicable neighbors
    for (int index = 0; index < 9; index++) {
        int Nval = [[Nindex objectAtIndex:index] intValue];
        int xNbr = [[xIndexNbr objectAtIndex:index] intValue];
        float xCen = [[xCenter objectAtIndex:index] floatValue];
        float yCen = [[yCenter objectAtIndex:index] floatValue];

        if (xNbr >= 0 && xNbr < nx
              && index != 4
            && fabsf(x-xCen) < (dx/2 + R)
            && fabsf(y-yCen) < (dy/2 + R)
            && Nval >= 0 && Nval < nx*ny) {

            // ball coordinates relative to the square center
            float xRel = x - xCen;
            float yRel = y - yCen;

            int val = [[LGEO objectAtIndex:Nval] intValue];
            
            if (val == 1) {
                
            // hit a solid block
            if (fabsf(xRel) > fabsf(yRel)) {
                ux = -COR*ux;
                x += ux;
            } else {
                uy = -COR*uy;
                y += -uy;
            }
                
            }

        }
    }

    // dynamics
    ux += 0.2*ax;
    uy += 0.2*ay;
}

@end

The basic idea of the ball-maze collision logic is this: At each time instant, we find out the location of the ball within the 2D (LGEO) array and find out the status (1 or 0) of all 8 neighboring cells. If the ball hits a neighboring solid block, we reverse the appropriate velocity component depending upon the location of the impact. The picture below shows a schematic of the idea, where I show balls impacting a solid square block from various directions.

Screen Shot 2014-05-24 at 5.46.30 AM

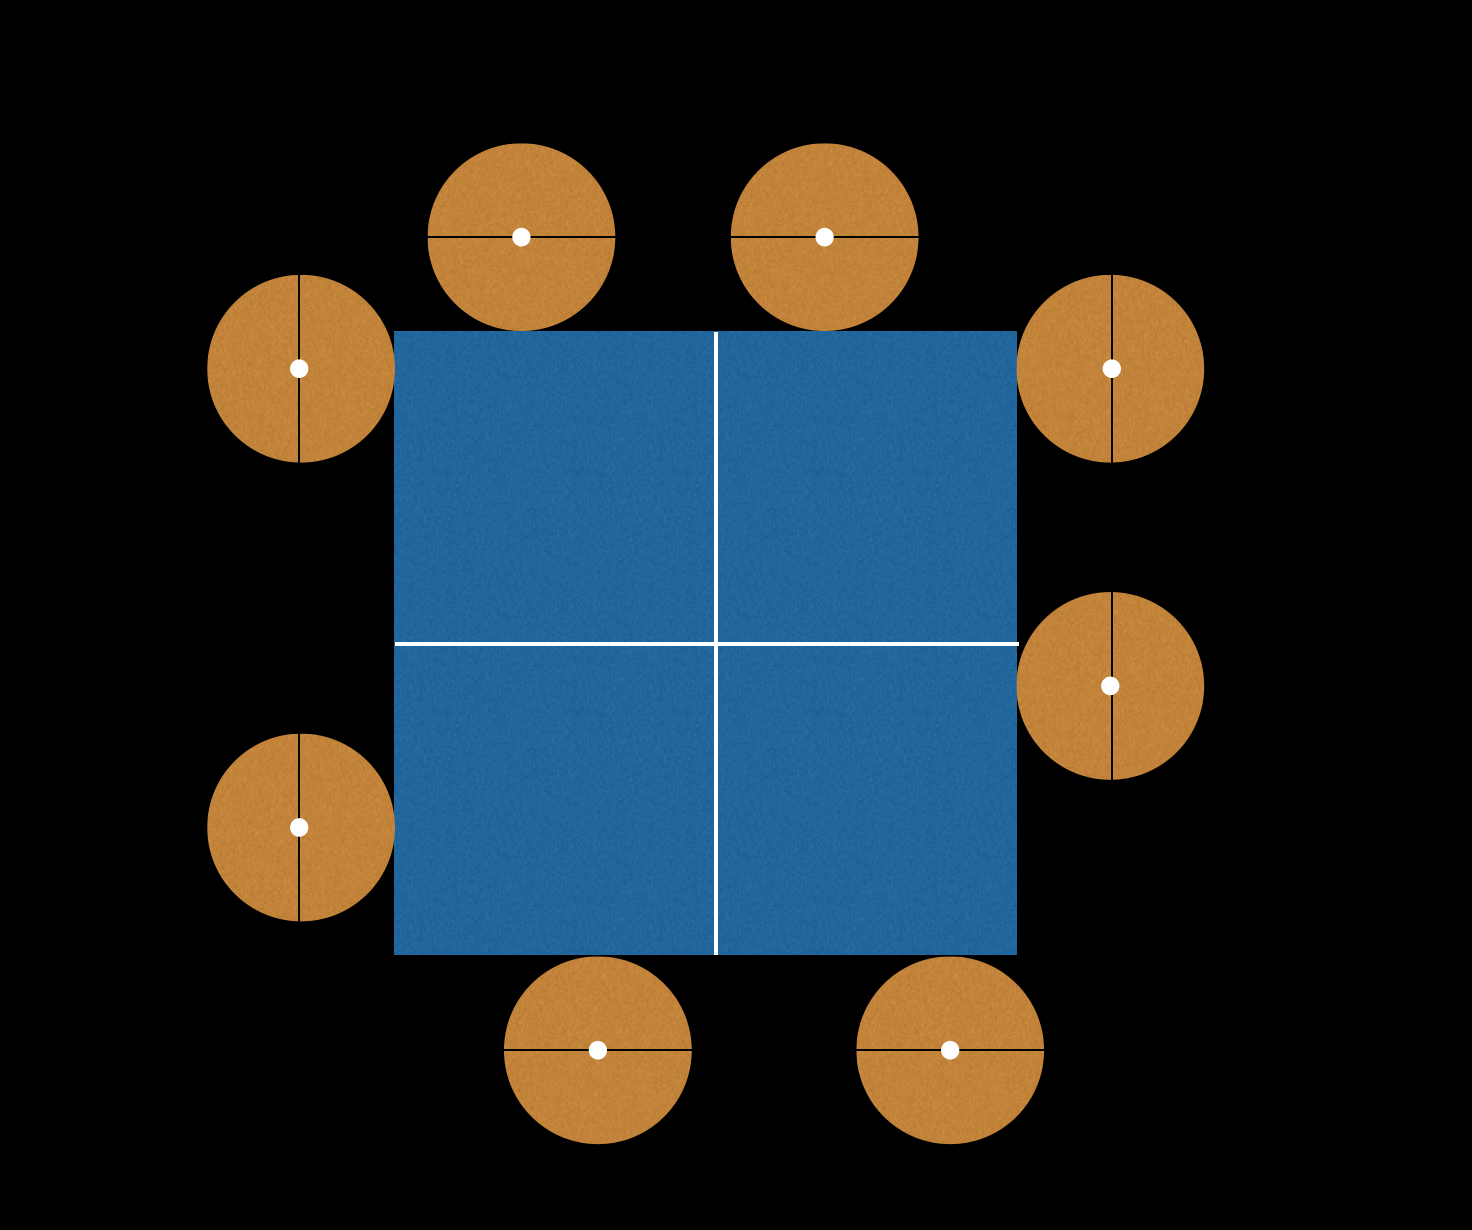
For the balls on the left and right of the block, the x-component of the ball center (relative to the square center) is more than the y-component. In such a case, we reverse the x-component of the velocity. For the balls to the top and bottom, we reverse the y-component of the velocity.

The values in the LGEO array can be changed in real-time by the user. These touch-based events are handled within the Controller. The method used to implement this logic is copied below for reference.

- (void) touchesBegan:(NSSet *)touches withEvent:(UIEvent *)event
{
    for (UITouch* t in touches) {
        CGPoint touchLocation;
        touchLocation = [t locationInView:blackBox];
        float x = touchLocation.x;
        float y = touchLocation.y;

        float width = blackBox.frame.size.width;
        float height = blackBox.frame.size.height;
        
        float dx = width / model.nx;
        float dy = height / model.ny;
        
        // find out array location where finger touches the screen
        int xIndex = x/dx;
        int yIndex = y/dy;
        int N = xIndex + model.nx*yIndex;
        
        // if touch is within array bounds, toggle LGEO value
        if (xIndex >=0 && xIndex < model.nx && yIndex >=0 && yIndex < model.ny) {
            int val = [[model.LGEO objectAtIndex:N] intValue];
            
            // update entry at that location in the model
            [model.LGEO removeObjectAtIndex:N];
            [model.LGEO insertObject:@(1-val) atIndex:N];

            [maze.LGEO removeObjectAtIndex:N];
            [maze.LGEO insertObject:@(1-val) atIndex:N];
        }
    }
}

Notice that we have a bounds check to make sure we don’t specify memory locations outside the specified array limits. Each touch in the UIView window toggles the LGEO array value at that location.

A side note: For those of us coming from C/C++, it may seem a little strange to not have to constantly clean up after our array declarations on the heap. Objective-C implements this clean up automagically via automatic reference counting.

Now that you understand the basic idea of how to specify a maze and implement collision detection, it is just a matter of detail to extend this project to create a game with various difficulty levels and keep track of the score and things of that sort. Perhaps I will return some day to make a game of this sort.

Bis dahin, Happy Xcoding!

iOS – Return to HOLES

In a previous post, I talked about my first iOS game using PhoneGap, which I called HOLES. At that time, I did not know as much about Xcode and Objective-C as I do now. Because of this reason, I wrote that game using HTML5/JavaScript and used PhoneGap to port the game to iOS.

Now that Objective-C is becoming more and more easy to use, I decided to revisit the game and write a completely native version. Here are some screenshots from version 1.0:

Screen Shot 2014-05-13 at 7.24.02 AM

I admit that it took me a lot more time to write this native iOS version compared to the HTML5 version, primarily because I am relatively new to Objective-C and to object oriented programming (OOP) in general. But it was well worth the effort because I learned several new things while working on this project and I believe the end result is an app that is more polished compared to the HTML5 version.

The entire project can be downloaded from my GitHub page using the following link:

https://github.com/jabhiji/ios-holes.git

What follows is a brief summary of the design – and some nuggets from Objective-C  – that I hope will be helpful to the new game developer.

The Model

Think about what parameters we might need in the abstract model of our game. To begin with, we are using the accelerometer to control the movement of a ball on screen. So we need to know the ball radius and the location (x, y) on screen. We also need the acceleration and velocity components and need some logic to (1) update the ball position (2) check for collisions with the domain walls (3) rotate the hole pattern (4) check if the ball falls inside a hole (5) check if the ball reaches the flag and (6) update the score and number of balls remaining and (7) detect when the game ends and reinitialize all parameters when the user presses the RESTART button.

All this and more is done using the GameModel class and the interface for this class is copied below.

#import <Foundation/Foundation.h>

@interface GameModel : NSObject

// center of the ball
@property float x, y, R;

// ball velocity
@property float ux, uy;

// coefficient of restitution
@property float COR;

// ball acceleration
@property float ax, ay;

// view size in points
@property float width;
@property float height;

// game score
@property int score;

// balls remaining
@property int ballsLeft;

// holes
@property int numberOfHoles;
@property NSMutableArray* xBH;
@property NSMutableArray* yBH;
@property NSMutableArray* radiusBH;
@property int ballInsideHole;
@property float dtheta;

// methods
- (void) setInitialBallPosition;
- (void) updateBallPosition;
- (void) resetHoles;
- (void) updateHoles;
- (void) checkHoleCapture;

@end

As usual, the idea is to instantiate an object of this class in ViewController and use the above properties and methods to help the controller send the appropriate data to the view for displaying the ball and hole pattern on screen and figuring out how the scene changes with time.

This app makes heavy use of an Objective-C class called NSMutableArray, which is a convenient way to deal with an array of objects. The Apple Developer website sums this up perfectly:

The NSMutableArray class declares the programmatic interface to objects that manage a modifiable array of objects. This class adds insertion and deletion operations to the basic array-handling behavior inherited from NSArray.

In the GameModel class, we use NSMutableArray to create an array of x-coordinates, y-coordinates and radii of the black holes. This is how you allocate and initialize the array:

        
        numberOfHoles = 5;

        xBH = [[NSMutableArray alloc] initWithCapacity:numberOfHoles];
        yBH = [[NSMutableArray alloc] initWithCapacity:numberOfHoles];
        radiusBH = [[NSMutableArray alloc] initWithCapacity:numberOfHoles];
        
        [xBH addObject:@(0.2*width)];
        [yBH addObject:@(0.2*height)];
        [radiusBH addObject:@(25.0)];
        
        [xBH addObject:@(0.8*width)];
        [yBH addObject:@(0.2*height)];
        [radiusBH addObject:@(25.0)];
        
        [xBH addObject:@(0.5*width)];
        [yBH addObject:@(0.5*height)];
        [radiusBH addObject:@(25.0)];
        
        [xBH addObject:@(0.2*width)];
        [yBH addObject:@(0.8*height)];
        [radiusBH addObject:@(25.0)];
        
        [xBH addObject:@(0.8*width)];
        [yBH addObject:@(0.8*height)];
        [radiusBH addObject:@(25.0)];

If you wish to access the data (floating-point numbers) stored in this array, you can use the following:

        
        float xH = [[xBH objectAtIndex:i] floatValue];
        float yH = [[yBH objectAtIndex:i] floatValue];
        float rH = [[radiusBH objectAtIndex:i] floatValue];

In this case, we are using simple floating point numbers as the “objects” stored in this array, but the same idea works for storing an array of objects of any class. This is what makes NSMutableArray a powerful and useful tool.

Like “addObject”, another useful method in NSMutableArray is “insertObject:(object) atIndex:(integer)”. We use this to reset the hole coordinates in one of the our GameModel class methods:

- (void) resetHoles
{
    float xH, yH;
    
    xH = 0.2*width;
    yH = 0.2*height;
    [xBH insertObject:@(xH) atIndex:0];
    [yBH insertObject:@(yH) atIndex:0];
    
    xH = 0.8*width;
    yH = 0.2*height;
    [xBH insertObject:@(xH) atIndex:1];
    [yBH insertObject:@(yH) atIndex:1];
    
    xH = 0.5*width;
    yH = 0.5*height;
    [xBH insertObject:@(xH) atIndex:2];
    [yBH insertObject:@(yH) atIndex:2];
    
    xH = 0.2*width;
    yH = 0.8*height;
    [xBH insertObject:@(xH) atIndex:3];
    [yBH insertObject:@(yH) atIndex:3];
    
    xH = 0.8*width;
    yH = 0.8*height;
    [xBH insertObject:@(xH) atIndex:4];
    [yBH insertObject:@(yH) atIndex:4];
}

We use NSMutableArray again in the Controller to manage the task of displaying all 5 holes.

The View(s)

The main items we need to display on screen are: (1) the yellow ball (2) the flag and (3) the black holes. Because all these shapes are easy to construct from geometric primitives, I decided to use custom UIView-based drawings. I called these classes Ball, Flag and Holes and they all inherit from the same UIView class.

The yellow ball:

// Custom drawing: yellow ball
- (void)drawRect:(CGRect)rect
{
    // get the current context
    CGContextRef context = UIGraphicsGetCurrentContext();
    
    // context size in pixels
    size_t WIDTH = CGBitmapContextGetWidth(context);
    size_t HEIGHT = CGBitmapContextGetHeight(context);
    
    // for retina display, 1 point = 2 pixels
    // context size in screen points
    float width = WIDTH/2.0;
    float height = HEIGHT/2.0;
    
    // center coordinates
    float xCen = width/2.0;
    float yCen = height/2.0;
    float maxR = width/2.0;     // WIDTH = HEIGHT in this case
    
    // yellow circle
    CGContextBeginPath(context);
    CGContextAddArc(context, xCen, yCen, maxR, 0, 2*M_PI, YES);
    [[UIColor yellowColor] setFill];
    CGContextDrawPath(context, kCGPathFill);
}

The black hole:

// custom drawing of a black hole
- (void)drawRect:(CGRect)rect
{
    // get the current context
    CGContextRef context = UIGraphicsGetCurrentContext();
    
    // context size in pixels
    size_t WIDTH = CGBitmapContextGetWidth(context);
    size_t HEIGHT = CGBitmapContextGetHeight(context);
    
    // for retina display, 1 point = 2 pixels
    // context size in screen points
    float width = WIDTH/2.0;
    float height = HEIGHT/2.0;
    
    // center coordinates
    float xCen = width/2.0;
    float yCen = height/2.0;
    float maxR = width/2.0;     // WIDTH = HEIGHT in this case
    
    // black circle
    CGContextBeginPath(context);
    CGContextAddArc(context, xCen, yCen, maxR, 0, 2*M_PI, YES);
    [[UIColor blackColor] setFill];
    CGContextDrawPath(context, kCGPathFill);
}

The flag:

// custom drawing for the flag
- (void)drawRect:(CGRect)rect
{
    // get the current context
    CGContextRef context = UIGraphicsGetCurrentContext();
    
    // context size in pixels
    size_t WIDTH = CGBitmapContextGetWidth(context);
    size_t HEIGHT = CGBitmapContextGetHeight(context);
    
    // for retina display, 1 point = 2 pixels
    // context size in screen points
    float width = WIDTH/2.0;
    float height = HEIGHT/2.0;
    
    // flag
    CGContextBeginPath(context);
    CGContextMoveToPoint(context, 0.2*width, 0.9*height);
    CGContextAddLineToPoint(context, 0.2*width, 0.1*height);
    CGContextAddLineToPoint(context, 0.8*width, 0.3*height);
    CGContextAddLineToPoint(context, 0.2*width, 0.5*height);
    CGContextClosePath(context);
    [[UIColor whiteColor] setFill];
    [[UIColor blackColor] setStroke];
    CGContextDrawPath(context, kCGPathFillStroke);
}

In the ViewController, we can instantiate objects of class Ball, Holes and Flag and specify where we want to display them in the superview.

The Controller

Because we need the accelerometer, we must add the CoreMotion framework to our project and include the corresponding header file in our interface. Here is the complete controller interface, with connections to the main storyboard:

controller interface

In the implementation file (ViewController.m), we talk with the model and views to get the game going. The first step is to synthesize the properties we defined in the interface so Objective-C can provide us with the corresponding setter and getter methods for using these objects.

#import "ViewController.h"

@interface ViewController ()

@end

@implementation ViewController

@synthesize model;
@synthesize motionManager;
@synthesize greenTable;
@synthesize ball;
@synthesize flag;
@synthesize holeArray;
@synthesize ballCount, showScore;
@synthesize timer;
@synthesize gameOverMessage;

// flag to check whether ball reached the flag
int reachedFlag = 0;

- (void)viewDidLoad
{
    [super viewDidLoad];
	// Do any additional setup after loading the view, typically from a nib.
    
    // hide "GAME OVER" label
    gameOverMessage.hidden = YES;
    
    // initialize flag view
    CGRect flagRect = CGRectMake(0, 0, 30, 30);
    flag = [[Flag alloc] initWithFrame:flagRect];
    [flag setBackgroundColor:[UIColor clearColor]];
    [greenTable addSubview:flag];
    
    // clip things outside the view
    greenTable.clipsToBounds = YES;
    
    // initialize Ball object
    CGRect ballRect = CGRectMake(100, 100, 40, 40);
    ball = [[Ball alloc] initWithFrame:ballRect];
    [ball setBackgroundColor:[UIColor clearColor]];
    
    // initialize model
    model = [[GameModel alloc] init];
    model.width  = greenTable.frame.size.width;
    model.height = greenTable.frame.size.height;
    [model setInitialBallPosition];
    [model resetHoles];
    
    // initial score is zero
    showScore.text = [NSString stringWithFormat:@"%i",0];
    ballCount.text = [NSString stringWithFormat:@"%i",model.ballsLeft];

    // init holeArray
    holeArray = [[NSMutableArray alloc] initWithCapacity:model.numberOfHoles];

    // draw holes
    for (int i=0; i<model.numberOfHoles; i++) {
        float xH = [[model.xBH objectAtIndex:i] floatValue];
        float yH = [[model.yBH objectAtIndex:i] floatValue];
        float rH = [[model.radiusBH objectAtIndex:i] floatValue];
        CGRect holeRect = CGRectMake(xH-rH, yH-rH, 2*rH, 2*rH);
        Holes* holeView = [[Holes alloc] initWithFrame:holeRect];
        [holeArray addObject:holeView];
        [holeArray[i] setBackgroundColor:[UIColor clearColor]];
        [greenTable addSubview:holeArray[i]];
    }
    
    // initialize motion manager
    motionManager = [[CMMotionManager alloc] init];
    motionManager.accelerometerUpdateInterval = 1.0/60.0;
    
    if ([motionManager isAccelerometerAvailable]) {
        
        [self startGameLoop];
        
    } else {
        
        NSLog(@"No accelerometer! You may be running on the iOS simulator...");
    }

}

Some things you may want to pay close attention to in the above code are:

  • Making the background transparent for UIView objects.
  • Clipping things outside the view
  • Creating an array of 5 objects of class “Holes” using NSMutableArray and displaying these objects.
  • Starting the accelerometer and the NSTimer based game animation.

The rest of the ViewController code deals with the main game loop, where we update the model and draw the ball and holes at their updated locations and keep track of the score and how many balls we have left.

I used a simple UILabel for displaying the “GAME OVER” message when we no longer have any balls left. This label is hidden from view for most of the game with

    // hide "GAME OVER" label
    gameOverMessage.hidden = YES;

When all balls are gone, we simply un-hide this label and bring it to the “front” using

            // show "GAME OVER" label
            [greenTable bringSubviewToFront:gameOverMessage];
            gameOverMessage.hidden = NO;

If you’ve read this far, you now have a pretty good idea of the thought process and coding decisions that went into making this game work. I think I am enjoying Objective-C more and more with each new app I write.

Happy Gaming!

iOS – Accelerometer App

A few weeks ago, I wrote about how to access the iPhone accelerometer using HTML5 and the PhoneGap API. In this post, I return to this topic and discuss a native Accelerometer app. Here is a screenshot of version 1.0:Screen Shot 2014-05-09 at 4.34.39 AM

In the above picture, I’ve kept the iPhone on a table, with the x and y axes in the plane of the table. The z-axis points up towards you, normal to the iPhone screen. The acceleration due to gravity (in our non-inertial frame of reference on the earths surface) is negative one (in units of g = 9.8 [m/s2]), which means it is in the direction of the negative z-axis. The numbers show the acceleration magnitude and the {x,y,z} components, with the minimum and maximum values. Pressing the reset button erases the minimum and maximum values.

The polar grid is for displaying the instantaneous acceleration in the x-y plane. Because the acceleration is along z in this picture, the yellow ball is at the origin (zero x and y components). The circles correspond to different g values. If we place the iPhone on its edge in a vertical position on the table, we get the following result:

Screen Shot 2014-05-09 at 4.47.58 AM

As you expected, the x-component is now 1.0 and the y and z components are zero. You can play with this app by downloading the source code from

https://github.com/jabhiji/ios-accelerometer.git

If you’ve been following my journey in iOS land, there were primarily two new things I learned while making this app:

  • Using the CoreMotion Framework – this is where all the “motion sensing” classes live. You need to add this framework to your project and instantiate a CMMotionManager object to talk to the accelerometer.
#import <UIKit/UIKit.h>
#import <CoreMotion/CoreMotion.h>
#import "Model.h"
#import "Circles.h"

@interface ViewController : UIViewController

// labels
@property (strong, nonatomic) IBOutlet UILabel *minMag;
@property (strong, nonatomic) IBOutlet UILabel *magnitude;
@property (strong, nonatomic) IBOutlet UILabel *maxMag;
@property (strong, nonatomic) IBOutlet UILabel *accX;
@property (strong, nonatomic) IBOutlet UILabel *accY;
@property (strong, nonatomic) IBOutlet UILabel *accZ;
@property (strong, nonatomic) IBOutlet UILabel *minX;
@property (strong, nonatomic) IBOutlet UILabel *minY;
@property (strong, nonatomic) IBOutlet UILabel *minZ;
@property (strong, nonatomic) IBOutlet UILabel *maxX;
@property (strong, nonatomic) IBOutlet UILabel *maxY;
@property (strong, nonatomic) IBOutlet UILabel *maxZ;

// motion manager
@property (strong, nonatomic) CMMotionManager *motionManager;

// rolling ball model
@property (strong, nonatomic) Model *model;

// the view
@property (strong, nonatomic) IBOutlet Circles *myView;

// the ball images
@property (nonatomic, strong) UIImage* yellowball;
@property (nonatomic, strong) UIImageView* ballView;
- (IBAction)resetValues:(id)sender;

@end

The implementation file shows how to initialize this new object and use it to talk to the accelerometer:

#import "ViewController.h"

@interface ViewController ()

@end

@implementation ViewController

@synthesize minMag, magnitude, maxMag;
@synthesize minX, minY, minZ;
@synthesize accX, accY, accZ;
@synthesize maxX, maxY, maxZ;
@synthesize model;
@synthesize myView;
@synthesize motionManager;
@synthesize yellowball;
@synthesize ballView;

- (void)viewDidLoad
{
    [super viewDidLoad];
	// Do any additional setup after loading the view, typically from a nib.
    
    // ball image
    yellowball = [UIImage imageNamed:@"yellowBall.png"];
    
    // draw custom drawing inside the view (as background)
    [myView setNeedsDisplay];
    
    // crop anything that is outside the view
    myView.clipsToBounds = YES;
    
    // initialize model
    model = [[Model alloc] init];
    model.width  = self.myView.frame.size.width;
    model.height = self.myView.frame.size.height;
    [model setInitialBallPosition];
    
    // initialize UIIMageView object
    ballView = [[UIImageView alloc] init];
    ballView.image = yellowball;
    
    // initialize motion manager
    motionManager = [[CMMotionManager alloc] init];
    motionManager.accelerometerUpdateInterval = 1.0/60.0;

    if ([motionManager isAccelerometerAvailable]) {
        
        [self startGameLoop];
        
    } else {
        
        NSLog(@"No accelerometer! You may be running on the iOS simulator...");
    }

}

// get acceleration data and animate ball motion based on current acceleration
- (void) startGameLoop
{
    NSOperationQueue *queue = [[NSOperationQueue alloc] init];
    
    [motionManager startAccelerometerUpdatesToQueue:queue withHandler:^(CMAccelerometerData *accelerometerData, NSError *error) {
        dispatch_async(dispatch_get_main_queue(), ^{
          
            // acceleration components (X, Y and Z)
            model.accelerationX = accelerometerData.acceleration.x;
            model.accelerationY = accelerometerData.acceleration.y;
            model.accelerationZ = accelerometerData.acceleration.z;
.
.
.
.

@end
  • Using the CoreGraphics API for custom drawing inside a UI View, starting with getting the current graphics context and learning the difference between points and pixels. This stuff is found in Circles.m, the implementation file for the Circles class.
#import "Circles.h"

@implementation Circles

- (id)initWithFrame:(CGRect)frame
{
    self = [super initWithFrame:frame];
    if (self) {
        // Initialization code
    }
    return self;
}

// Only override drawRect: if you perform custom drawing.
// An empty implementation adversely affects performance during animation.
- (void)drawRect:(CGRect)rect
{
    [self drawCircles];
}

// polar grid on which the instantaneous acceleration is displayed in real time
- (void) drawCircles
{
    // get the current context
    CGContextRef context = UIGraphicsGetCurrentContext();
    
    // context size in pixels
    size_t WIDTH = CGBitmapContextGetWidth(context);
    size_t HEIGHT = CGBitmapContextGetHeight(context);
    
    // for retina display, 1 point = 2 pixels
    // context size in screen points
    float width = WIDTH/2.0;
    float height = HEIGHT/2.0;
    
    // center coordinates
    float xCen = width/2.0;
    float yCen = height/2.0;
    float maxR = width/2.0;     // WIDTH = HEIGHT in this app
    float ONEGEE = 0.666*maxR;
    
    // big circle to fill corners
    CGContextBeginPath(context);
    CGContextAddArc(context, xCen, yCen, 3*ONEGEE, 0, 2*M_PI, YES);
    [[UIColor blueColor] setFill];
    [[UIColor blackColor] setStroke];
    CGContextDrawPath(context, kCGPathFillStroke);
    
    // outermost red circle (2g)
    CGContextBeginPath(context);
    CGContextAddArc(context, xCen, yCen, 2*ONEGEE, 0, 2*M_PI, YES);
    [[UIColor blueColor] setFill];
    [[UIColor blackColor] setStroke];
    CGContextDrawPath(context, kCGPathFillStroke);
    
    // blue circle (1g)
    CGContextBeginPath(context);
    CGContextAddArc(context, xCen, yCen, ONEGEE, 0, 2*M_PI, YES);
    [[UIColor blueColor] setFill];
    [[UIColor blackColor] setStroke];
    CGContextDrawPath(context, kCGPathFillStroke);
    
    // unfilled circles (0.5g)
    CGContextBeginPath(context);
    CGContextAddArc(context, xCen, yCen, 0.5*ONEGEE, 0, 2*M_PI, YES);
    [[UIColor blackColor] setStroke];
    CGContextDrawPath(context, kCGPathStroke);
    
    // unfilled circles (1.5g)
    CGContextBeginPath(context);
    CGContextAddArc(context, xCen, yCen, 1.5*ONEGEE, 0, 2*M_PI, YES);
    [[UIColor blackColor] setStroke];
    CGContextDrawPath(context, kCGPathStroke);
    
    // horizontal centerline
    CGContextBeginPath(context);
    CGContextMoveToPoint(context, 0, height/2);
    CGContextAddLineToPoint(context, width, height/2);
    [[UIColor blackColor] setStroke];
    CGContextDrawPath(context, kCGPathStroke);
    
    // vertical centerline
    CGContextBeginPath(context);
    CGContextMoveToPoint(context, width/2, 0);
    CGContextAddLineToPoint(context, width/2, height);
    [[UIColor blackColor] setStroke];
    CGContextDrawPath(context, kCGPathStroke);
    
    // diagonal 1
    CGContextBeginPath(context);
    CGContextMoveToPoint(context, 0, 0);
    CGContextAddLineToPoint(context, width, height);
    [[UIColor blackColor] setStroke];
    CGContextDrawPath(context, kCGPathStroke);

    // diagonal 2
    CGContextBeginPath(context);
    CGContextMoveToPoint(context, width, 0);
    CGContextAddLineToPoint(context, 0, height);
    [[UIColor blackColor] setStroke];
    CGContextDrawPath(context, kCGPathStroke);
}

@end

—-

Once your device has this app, there are some interesting experiments you can do to test how many g’s your body experiences while walking, running, walking up and down the stairs and so on and so forth. Here is a quick summary of the acceleration magnitude range in some random experiments:

  • Standing still – 1g
  • Normal walking – 0.7g to 1.8g
  • Walking up the stairs – 0.4g to 2.0g
  • Going downstairs – 0.1g to 3.3g
  • Jumping up and down – 0g to 2.5g
  • Vigorously shaking the phone – 0g to 3.5g

Finally, if you throw your iPhone in the air, it will temporarily experience “weightless” conditions (just like it does when you jump up and down) and the app will record the minimum acceleration magnitude to be zero. But the impulse when you throw it and catch it again could be up to 3.5g. The above set of results come with some caveats that you should keep in mind: (1) The data is obtained at 60 Hz. Thus, impulses imparted in a time interval less than 1/60th of a second may not be recorded accurately. (2) I was not able to get a reading more than 3.5g for the maximum acceleration. This might be the maximum limit of the hardware.

In summary, we learned how to write a native iOS app that queries the built-in accelerometer and displays the values on screen in real-time. In the next version of this app, I plan to add in another screen where we can plot the different accelerations as a single graph or multiple graphs, with time on the x-axis.

iOS – SpaceBalls

In this post, I will introduce the Model-View-Controller design paradigm and use NSTimer-based animation to make the iPhone app shown in the video below.

The basic idea here is to simulate the motion of two circular balls enclosed inside a rectangular box in 2D space. The balls can collide with each other and with the walls of the rectangular box. To keep things simple, all collisions are perfectly elastic. The user can start and stop the animation using the two buttons in the UI.

Model View Controller (MVC)

MVC is an elegant way to organize the classes within your project based on their function. Here is an attempt at a quick summary using the present app as an example:

  • MODEL – this is where we store abstract information about our model, which in this case is the radius of the two balls, their position (x and y coordinates) and their velocity (x and y components). In addition, this can also contain the logic needed to detect collisions with the walls and between each other and to advance the position of the balls in time.
  • VIEW – The View class (inherits from UIView) is mainly concerned with drawing the two balls on the sub-view or drawing canvas or graphics context or whatever you may wish to call it. We provide the controller with an instance of this class by creating an IBOutlet property.
  • CONTROLLER – this class reads in information from the model, properly interprets this information and sends it to the view for drawing. It also deals with user input (button clicks in this case) from the view.

The whole MVC idea is to promote better object-oriented coding habits and help make the code easier to understand, maintain and expand in the future.

For example, this code started with just one ball. To add the second ball, I simply went into the Model class and added the necessary information about the second ball. Then I had to go to the ViewController class and add the model properties for drawing the second ball. Here is a snapshot of the Model class interface:

#import <Foundation/Foundation.h>

@interface Model : NSObject

@property float x1;
@property float x2;
@property float y1;
@property float y2;
@property float R;

@property float speedX1;
@property float speedY1;
@property float speedX2;
@property float speedY2;

@property float WIDTH;
@property float HEIGHT;

- (void) updateBallPositions;

@end

Coordinates and velocity components for the two balls are identified using “1” and “2” respectively. The WIDTH and HEIGHT property refers to the size of the box inside which the balls are moving around. Setting the values for WIDTH and HEIGHT is an example where the controller serves as a liaison between the view and the model. The code snippet below is from ViewController.m and illustrates how the initial condition is set up (before the animation begins).

// ball is drawn at a random location on screen (based on the model)
- (void)viewDidLoad
{
    [super viewDidLoad];
	// Do any additional setup after loading the view, typically from a nib.
    ball1 = [UIImage imageNamed:@"yellowBall.png"];
    ball2 = [UIImage imageNamed:@"whiteBall.png"];

    // instantiate model variables
    model = [[Model alloc] init];
    model.WIDTH  = self.blackView.frame.size.width;
    model.HEIGHT = self.blackView.frame.size.height;
    [model setInitialBallPositions];

    // display initial condition before animation starts
    [self showBalls];
}

We can see that the Controller obtains the size of the “blackView” object (of class UI View) and passes this information along to the “model” object (of class Model).

That the controller can talk with both the model and the view is immediately clear if you look at the ViewController interface, which includes the model and view header files.

#import <UIKit/UIKit.h>

// Controller talks with the Model and the View

#import "Model.h"
#import "View.h"

@interface ViewController : UIViewController

@property (nonatomic, strong) Model* model;
@property (nonatomic, strong) UIImage* ball1;
@property (nonatomic, strong) UIImage* ball2;
@property (nonatomic, strong) IBOutlet View *blackView;
@property (nonatomic, strong) UIImageView* ballView1;
@property (nonatomic, strong) UIImageView* ballView2;
@property (nonatomic, strong) NSTimer* timer;

- (IBAction)startTimer:(id)sender;
- (IBAction)stopTimer:(id)sender;
- (void) update;

@end

For those new to object oriented programming, notice that we instantiate a Model class called model and make it a property. All of the machinery for the class we designed will be available to this instance variable.

Animation using NSTimer

This app introduces one of the commonly used way to do animations in iOS. This technique is quite similar to the setInterval-based animation technique used in HTML5/JavaScript animations, where the code calls a function or method continuously at preset time intervals. Here is a code snapshot of the startTimer method, which is triggered when the user presses the START button on the UI:

// pressing the START button begins the animation
- (IBAction)startTimer:(id)sender {
    
    // remove previously active instances (if any)
    [timer invalidate];
    timer = nil;
    
    // create a new timer based loop
    timer = [NSTimer timerWithTimeInterval:1.0/60.0
                                     target:self
                                   selector:@selector(update)
                                   userInfo:nil
                                    repeats:YES];
    
    [[NSRunLoop mainRunLoop] addTimer:timer forMode:NSDefaultRunLoopMode];
}

In this case, the update method is called repeatedly at a frequency of 60 frames per second. To stop the animation, simply destroy the timer as shown below.

// pressing the STOP button stops the animation
- (IBAction)stopTimer:(id)sender {
    [timer invalidate];
    timer = nil;
}

This approach appears to work quite well for the animation needs of this app.

Future Work

Be aware that the ball-ball collision model used here is rather simplistic and based on a “momentum exchange upon impact” approach. This is applicable only for collisions where the velocities before impact are collinear. In the future, I plan to use a more sophisticated model that accounts for oblique impacts.

I hope this post clears up some of the mystery surrounding the MVC design paradigm. You can clone the entire project from my GitHub link:

https://github.com/jabhiji/ios-bouncing-ball.git

Happy Xcoding!

IOS – Stick Man

Now that we have some basic knowledge about how to design simple apps, it is time to start having some fun. This post is about an app I developed mainly to play with the idea of using several UI Image View “layers” for doing graphics. We’ll also learn how to create a simple animation by using a series of image files.

The title refers to a simple cartoon-like character I ended up naming as the “Stick Man”. You’ve met him before if you’ve read my earlier post about adding images. He’s also the lead character in an earlier HTML5 adventure. Anyhow, here are some screenshots of the iPhone app in action:

Screen Shot 2014-05-02 at 1.12.00 AM

The user can click on any of the six buttons to control what the Stick Man can do. Here is a quick summary of the buttons:

  • READ – reads the newspaper looking for news about iPhone 6.
  • HAPPY – put a smile on his face.
  • SAD – not so happy anymore.
  • HAT – toggle the hat (wear it or remove it).
  • FLY – mimic flying with his hands.
  • PENDULUM – shows an oscillating pendulum.

As before, the images for the buttons were created in Keynote and pressing each button triggered a class method for doing that specific task. And there were the usual property declarations in the interface, with the corresponding @synthesize statements in the implementation. The source code for this app is available at

https://github.com/jabhiji/ios-stickman.git

Using several layers for graphics

Like I mentioned before, my idea here was to use several UI Image View objects on top of each other for displaying different sections of the Stick Man.

Screen Shot 2014-05-02 at 1.30.33 AM

Each layer is transparent and can load and display its own image and all layers work together to display the final image the user sees. Also note that each layer can simultaneously run its own animation using a series of images (animation frames). For example, the pendulum animation involves displaying two images of the pendulum on the “pendulum layer”, while the rest of the image (face, hands etc) remain static on other layers.

Creating animation from a series of images

If you have a series of image files that show the motion of something in time, you can create a simple animation that can display these images one after another in a specified amount of time on any given UI Image View layer. The code to animate the pendulum is copied below for reference.

- (IBAction)usePendulum:(id)sender {
    [layer3 stopAnimating];
    [layer4 stopAnimating];
    [eyeLayer stopAnimating];

    [eyeLayer     setImage:[UIImage imageNamed: @"eyes.png"]];
    [layer1       setImage:[UIImage imageNamed: @"happy.png"]];
    [layer3       setImage:[UIImage imageNamed: @"leftHandHorizontal.png"]];
    [layer4       setImage:[UIImage imageNamed: @"rightHandUp.png"]];
    [newsLayer    setImage:[UIImage imageNamed: @"empty.png"]];
    
    stickManSays.text = [NSString stringWithFormat:@"Check out my pendulum.."];

    // Load image sequence for pendulum motion
    NSArray *imagesPendulum = @[@"pendulum1.png", @"pendulum2.png"];
    
    NSMutableArray *imageSeqPendulum = [[NSMutableArray alloc] init];
    for (int i = 0; i < imagesPendulum.count; i++) {
        [imageSeqPendulum addObject:[UIImage imageNamed:[imagesPendulum objectAtIndex:i]]];
    }
    
    // start animation in the pendulum layer
    pendulumLayer.animationImages = imageSeqPendulum;
    pendulumLayer.animationDuration = 0.75;
    [pendulumLayer startAnimating];
}

Note how the static Stick Man image is assembled in several layers. Also, previously running animations in other layers (if any) are stopped before beginning this particular animation.

This app introduced the idea of using several layers and animating images within a given layer. In future posts, we will continue to explore other ways to create animations in iOS.