In my last post, we learned how to use the UIKit framework for drawing simple shapes on the iPhone/iPad screen. In this post, we find out how to load and display external image files in the same view, using the UIImage class.
Quoting again from the relevant portion of the Apple developer website:
A
UIImageobject is a high-level way to display image data. You can create images from files, from Quartz image objects, or from raw image data you receive. TheUIImageclass also offers several options for drawing images to the current graphics context using different blend modes and opacity values.
This is what the application will look like after we’re done loading and displaying all the images:
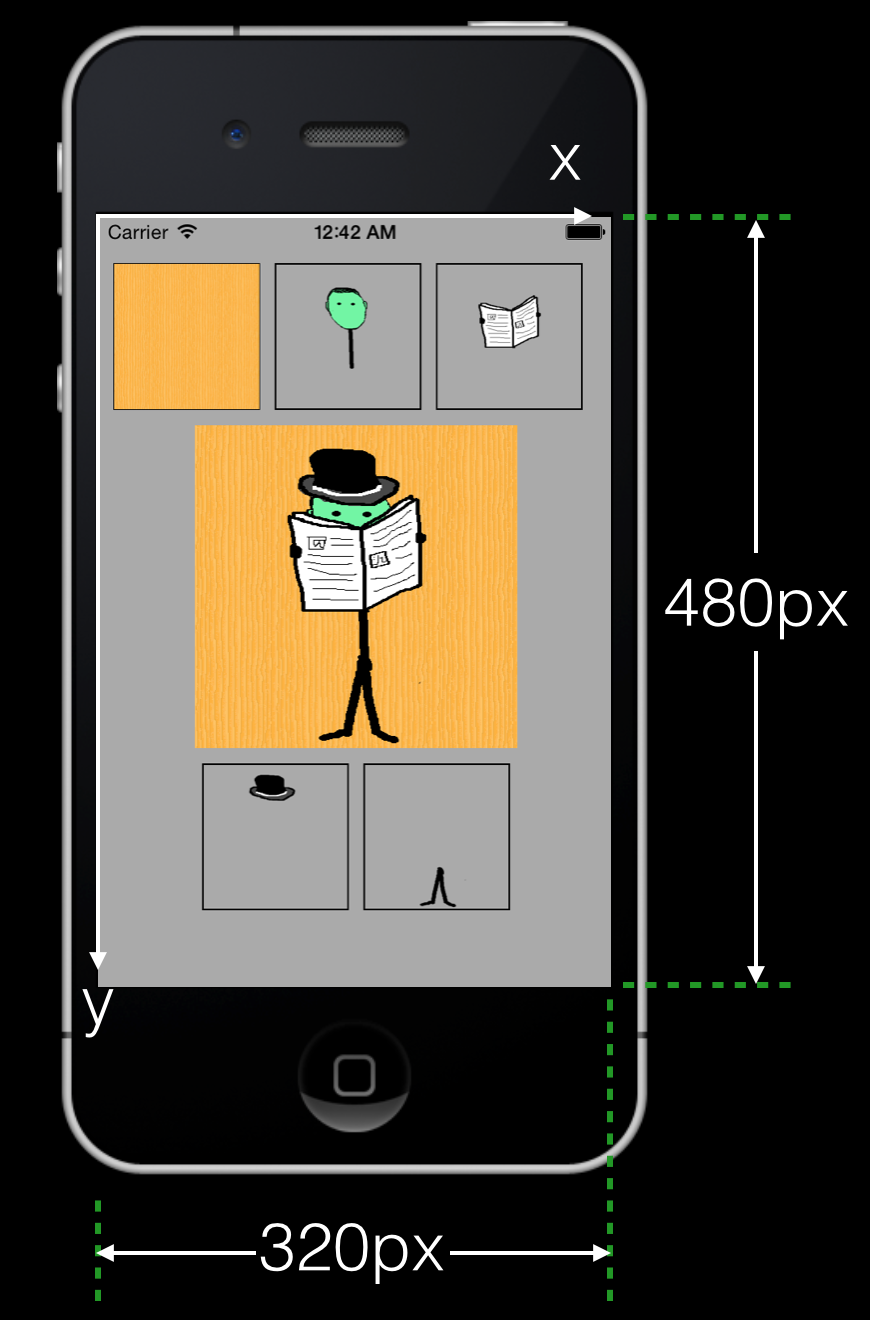
For the purpose of this app, I used the exact same set of images I used for my HTML5 cartoon. Each individual image was created using GIMP and was 400 pixels by 400 pixels. In this case, each individual image (except the background) is on a transparent layer. Thus, the individual images can be assembled (in the right order) to create the final picture shown in the center.
Here is a step-by-step guide about how to create the view seen in the screenshot above:
STEP 1: Create a Single View Application
Like the previous post, we create a single view application for iOS in Xcode and then create a subclass of UIView called drawShapes. Make sure that the DrawShapes class is associated with the Main Storyboard.
STEP 2: Copy image files to your project
In the “Project Navigator”, click on the “Supporting Files” folder and then click on
Files —-> Add Files to “Your Project Name”
Select the image files and make sure your tick the box below.

On a retina display, we can automatically display each image in a screen size of 200 pixels by 200 pixels, provided we append the “@2x” qualifier to the image name . However, in this application, we explicitly specify the location and size of the bounding rectangle inside which we want to place each image, so whether or not you use the “@2x” qualifier is irrelevant.
STEP 3: Customize the drawRect method
The APIs to load and draw images will be inside the drawRect method, like before. The complete implementation file for loading and displaying the images is provided below.
@implementation drawShapes

- (void)drawRect:(CGRect)rect
{
    CGRect quad;
    UIBezierPath *path;
    UIColor* strokeColor = [UIColor colorWithRed:0.0 green:0.0 blue:0.0 alpha:1.0];
    [strokeColor setStroke];
    [path stroke];

    // draw individual images in these squares
    quad = CGRectMake(10, 30, 90, 90);
    path = [UIBezierPath bezierPathWithRect:quad];
    [path stroke];

    quad = CGRectMake(110, 30, 90, 90);
    path = [UIBezierPath bezierPathWithRect:quad];
    [path stroke];

    quad = CGRectMake(210, 30, 90, 90);
    path = [UIBezierPath bezierPathWithRect:quad];
    [path stroke];

    quad = CGRectMake(65, 340, 90, 90);
    path = [UIBezierPath bezierPathWithRect:quad];
    [path stroke];

    quad = CGRectMake(165, 340, 90, 90);
    path = [UIBezierPath bezierPathWithRect:quad];
    [path stroke];

    // load external image files
    UIImage* background   = [UIImage imageNamed:@"background@2x.png"];
    UIImage* baseline     = [UIImage imageNamed:@"baseline@2x.png"];
    UIImage* readThePaper = [UIImage imageNamed:@"readThePaper@2x.png"];
    UIImage* hat          = [UIImage imageNamed:@"hat@2x.png"];
    UIImage* legs         = [UIImage imageNamed:@"legs@2x.png"];

    // drawing individual images
    [background   drawInRect:CGRectMake(10, 30, 90, 90)];
    [baseline     drawInRect:CGRectMake(110, 30, 90, 90)];
    [readThePaper drawInRect:CGRectMake(210, 30, 90, 90)];
    [hat          drawInRect:CGRectMake(65, 340, 90, 90)];
    [legs         drawInRect:CGRectMake(165, 340, 90, 90)];

    // drawing them together (in the right order)
    [background   drawInRect:CGRectMake(60, 130, 200, 200)];
    [baseline     drawInRect:CGRectMake(60, 130, 200, 200)];
    [readThePaper drawInRect:CGRectMake(60, 130, 200, 200)];
    [hat          drawInRect:CGRectMake(60, 130, 200, 200)];
    [legs         drawInRect:CGRectMake(60, 130, 200, 200)];

    CGSize imageSize = [baseline size];
    NSLog(@"Image height = %f width = %f",imageSize.height, imageSize.width);
}

@end
You can query the size of the images using the size method. In this case, the NSLog at the end prints out values of 400 each for the height and width.
STEP 3: Think about what you can do with images in your app
That’s all there is to the basic task of loading and displaying images in the current graphics context using the UIKit framework. In future posts, I’ll explore additional things we can do with image objects, including coordinate transformations and animation.